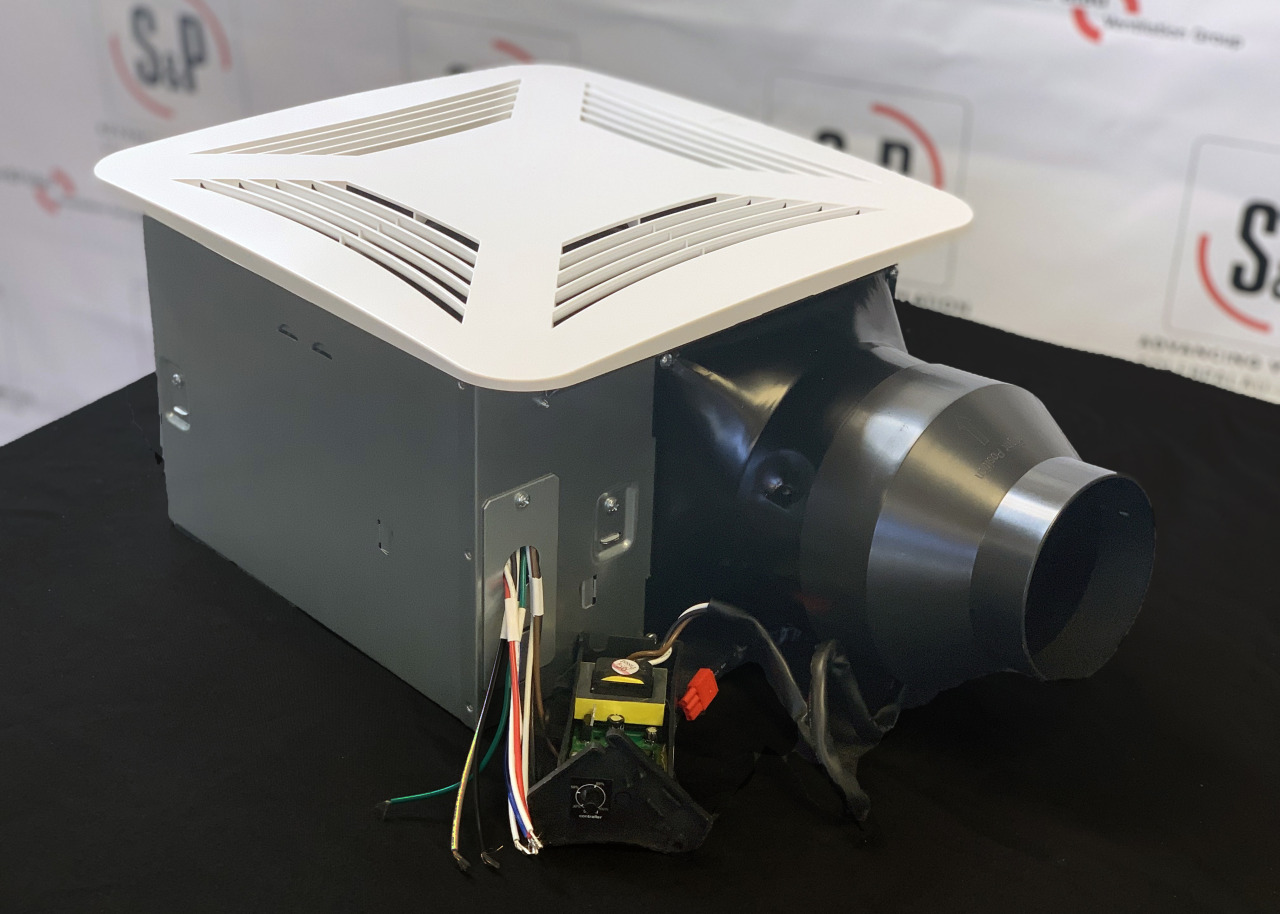
Soler & Palau Premium CHOICE Fans offer an easy solution for bathroom ventilation. With 5 different models to choose from, these fans feature customization to ensure the right fan for your project.
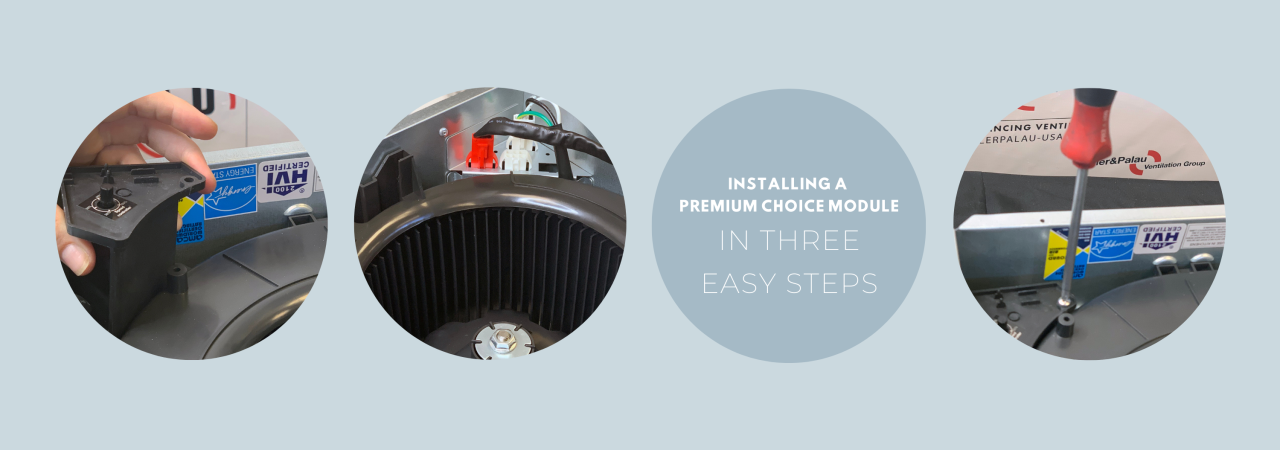
A Premium CHOICE module allows you to install a Speed Control, Humidity/Motor Sensor, or VOC Sensor during installation or as an upgrade at a later date. The innovative Plug-&-Play requires no complicated wiring. Read below for three easy steps in installing a Speed Control module. Always check your Installation, Operation and Maintenance (IOM) manual for additional details on setting your required settings.
You’ll need:
(1) Phillips head Screwdriver
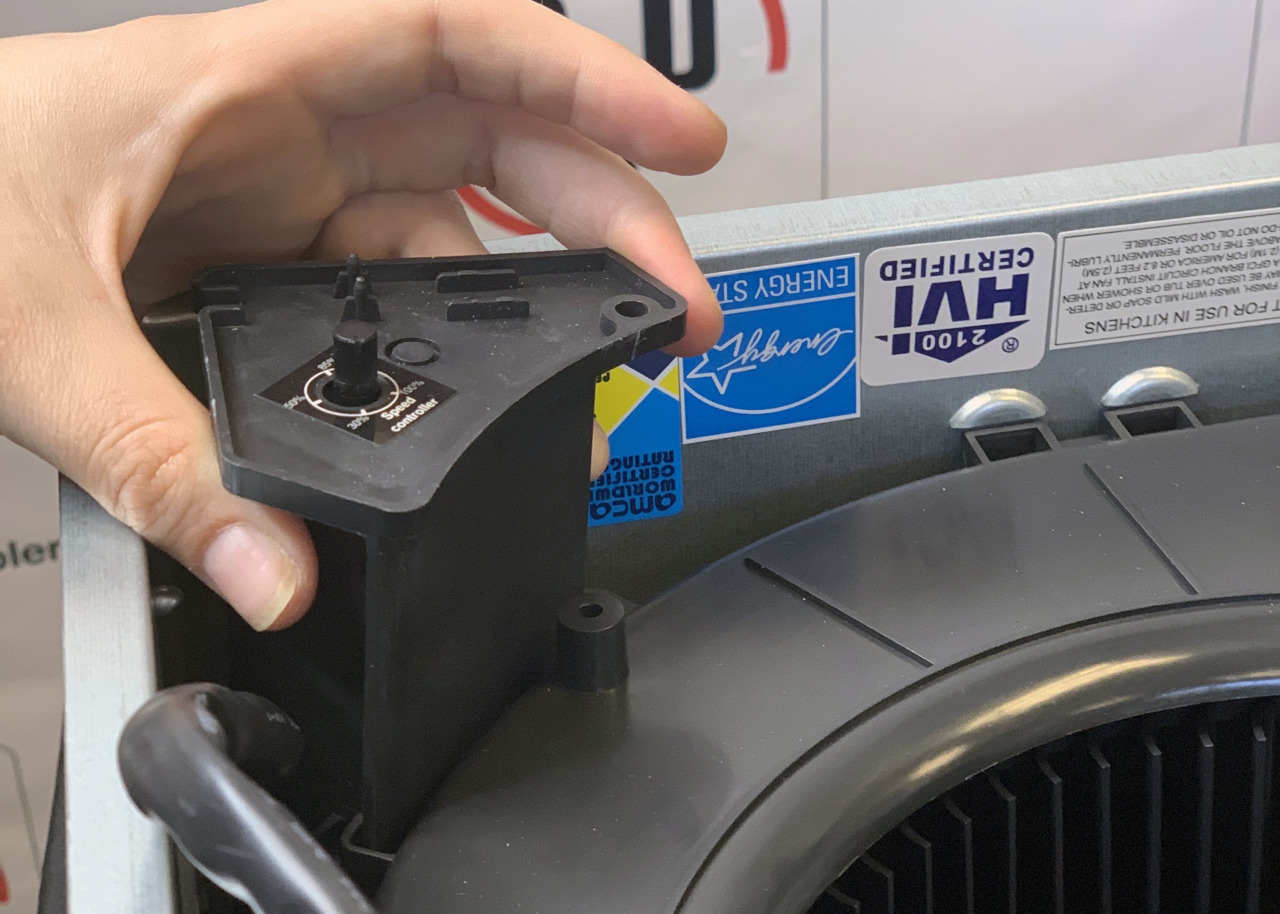
Step 1: Place the module
Place the module along the side of the fan housing in it’s designated spot. Ensure the screw hole is lined up and that the module slides into place in it’s bracket.
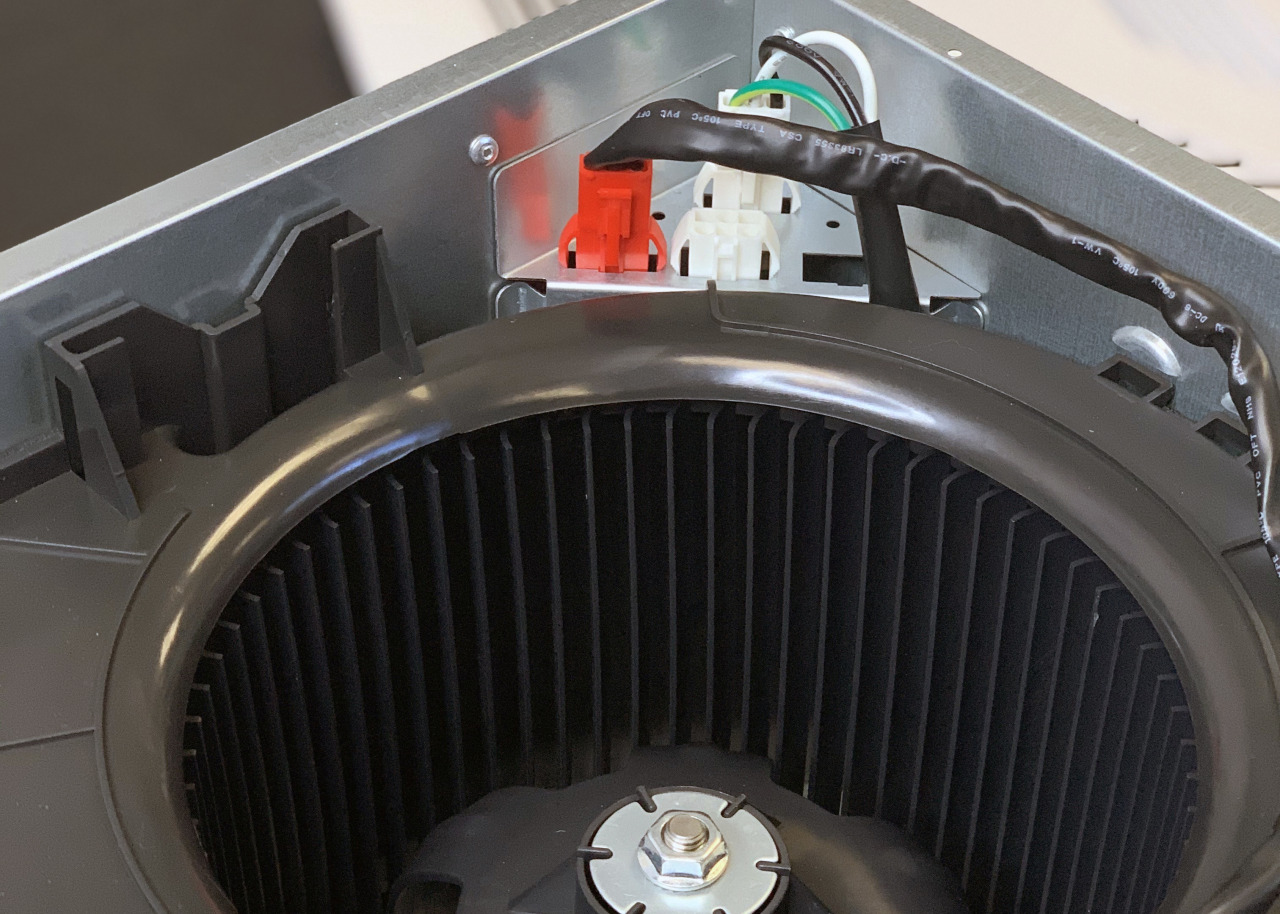
Step 2: Plug it in
Place the wiring through the plastic clip received in your package. Pull the wiring until it’s taut and plug it in on the opposite corner of the fan unit.
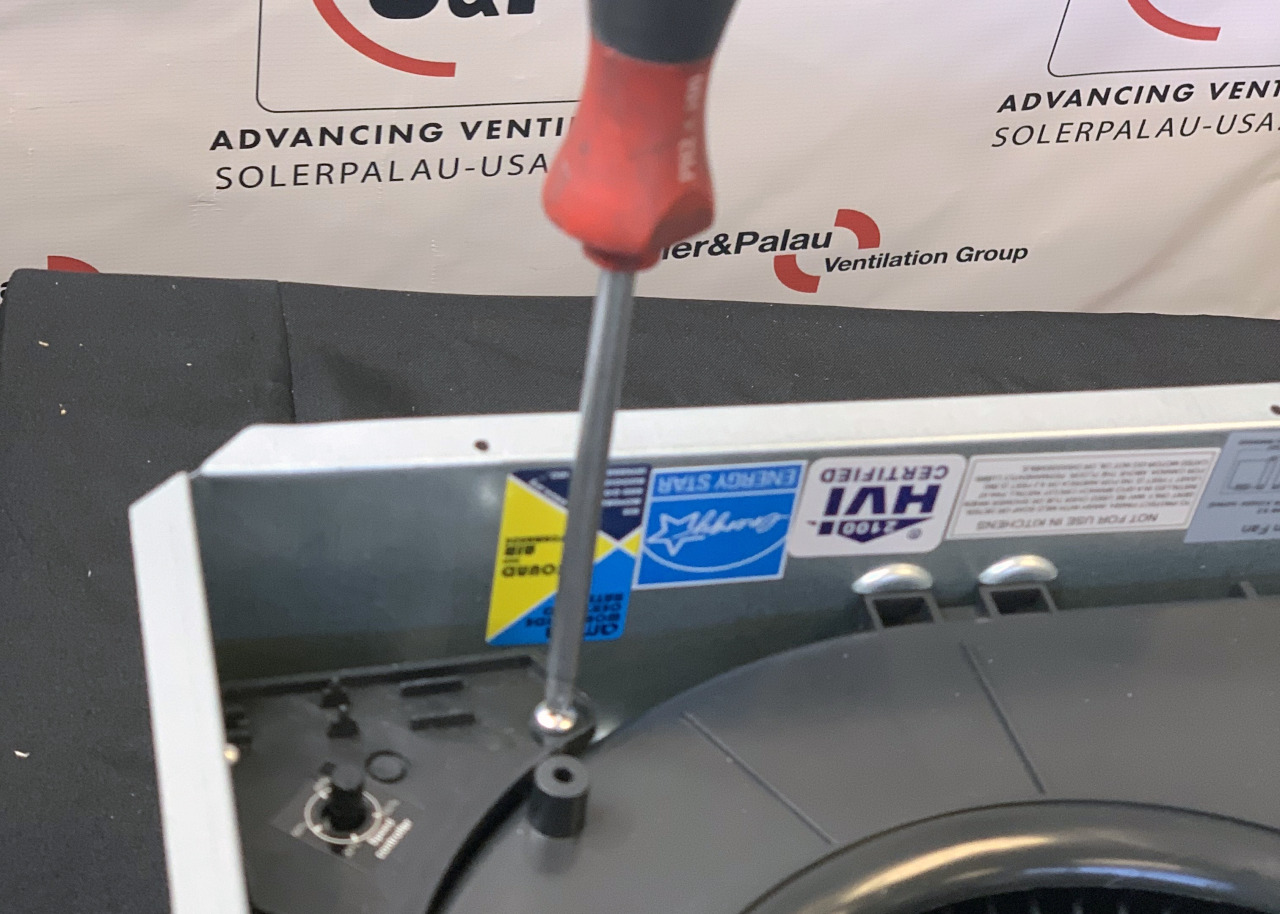
Step 3: Screw it in + Set
Screw in the module lining up the holes from step one. Ensure it is tight to avoid moving during operation. Set the module to your preferred settings.
If you have not installed your fan, your fan housing is now ready to go. If you are installing a module to a preinstalled fan, reverse steps 2 and 3 to avoid the module falling out of the fan.
Learn more about our Premium CHOICE series here or watch the newest REEL from S&P on our Instagram channel.