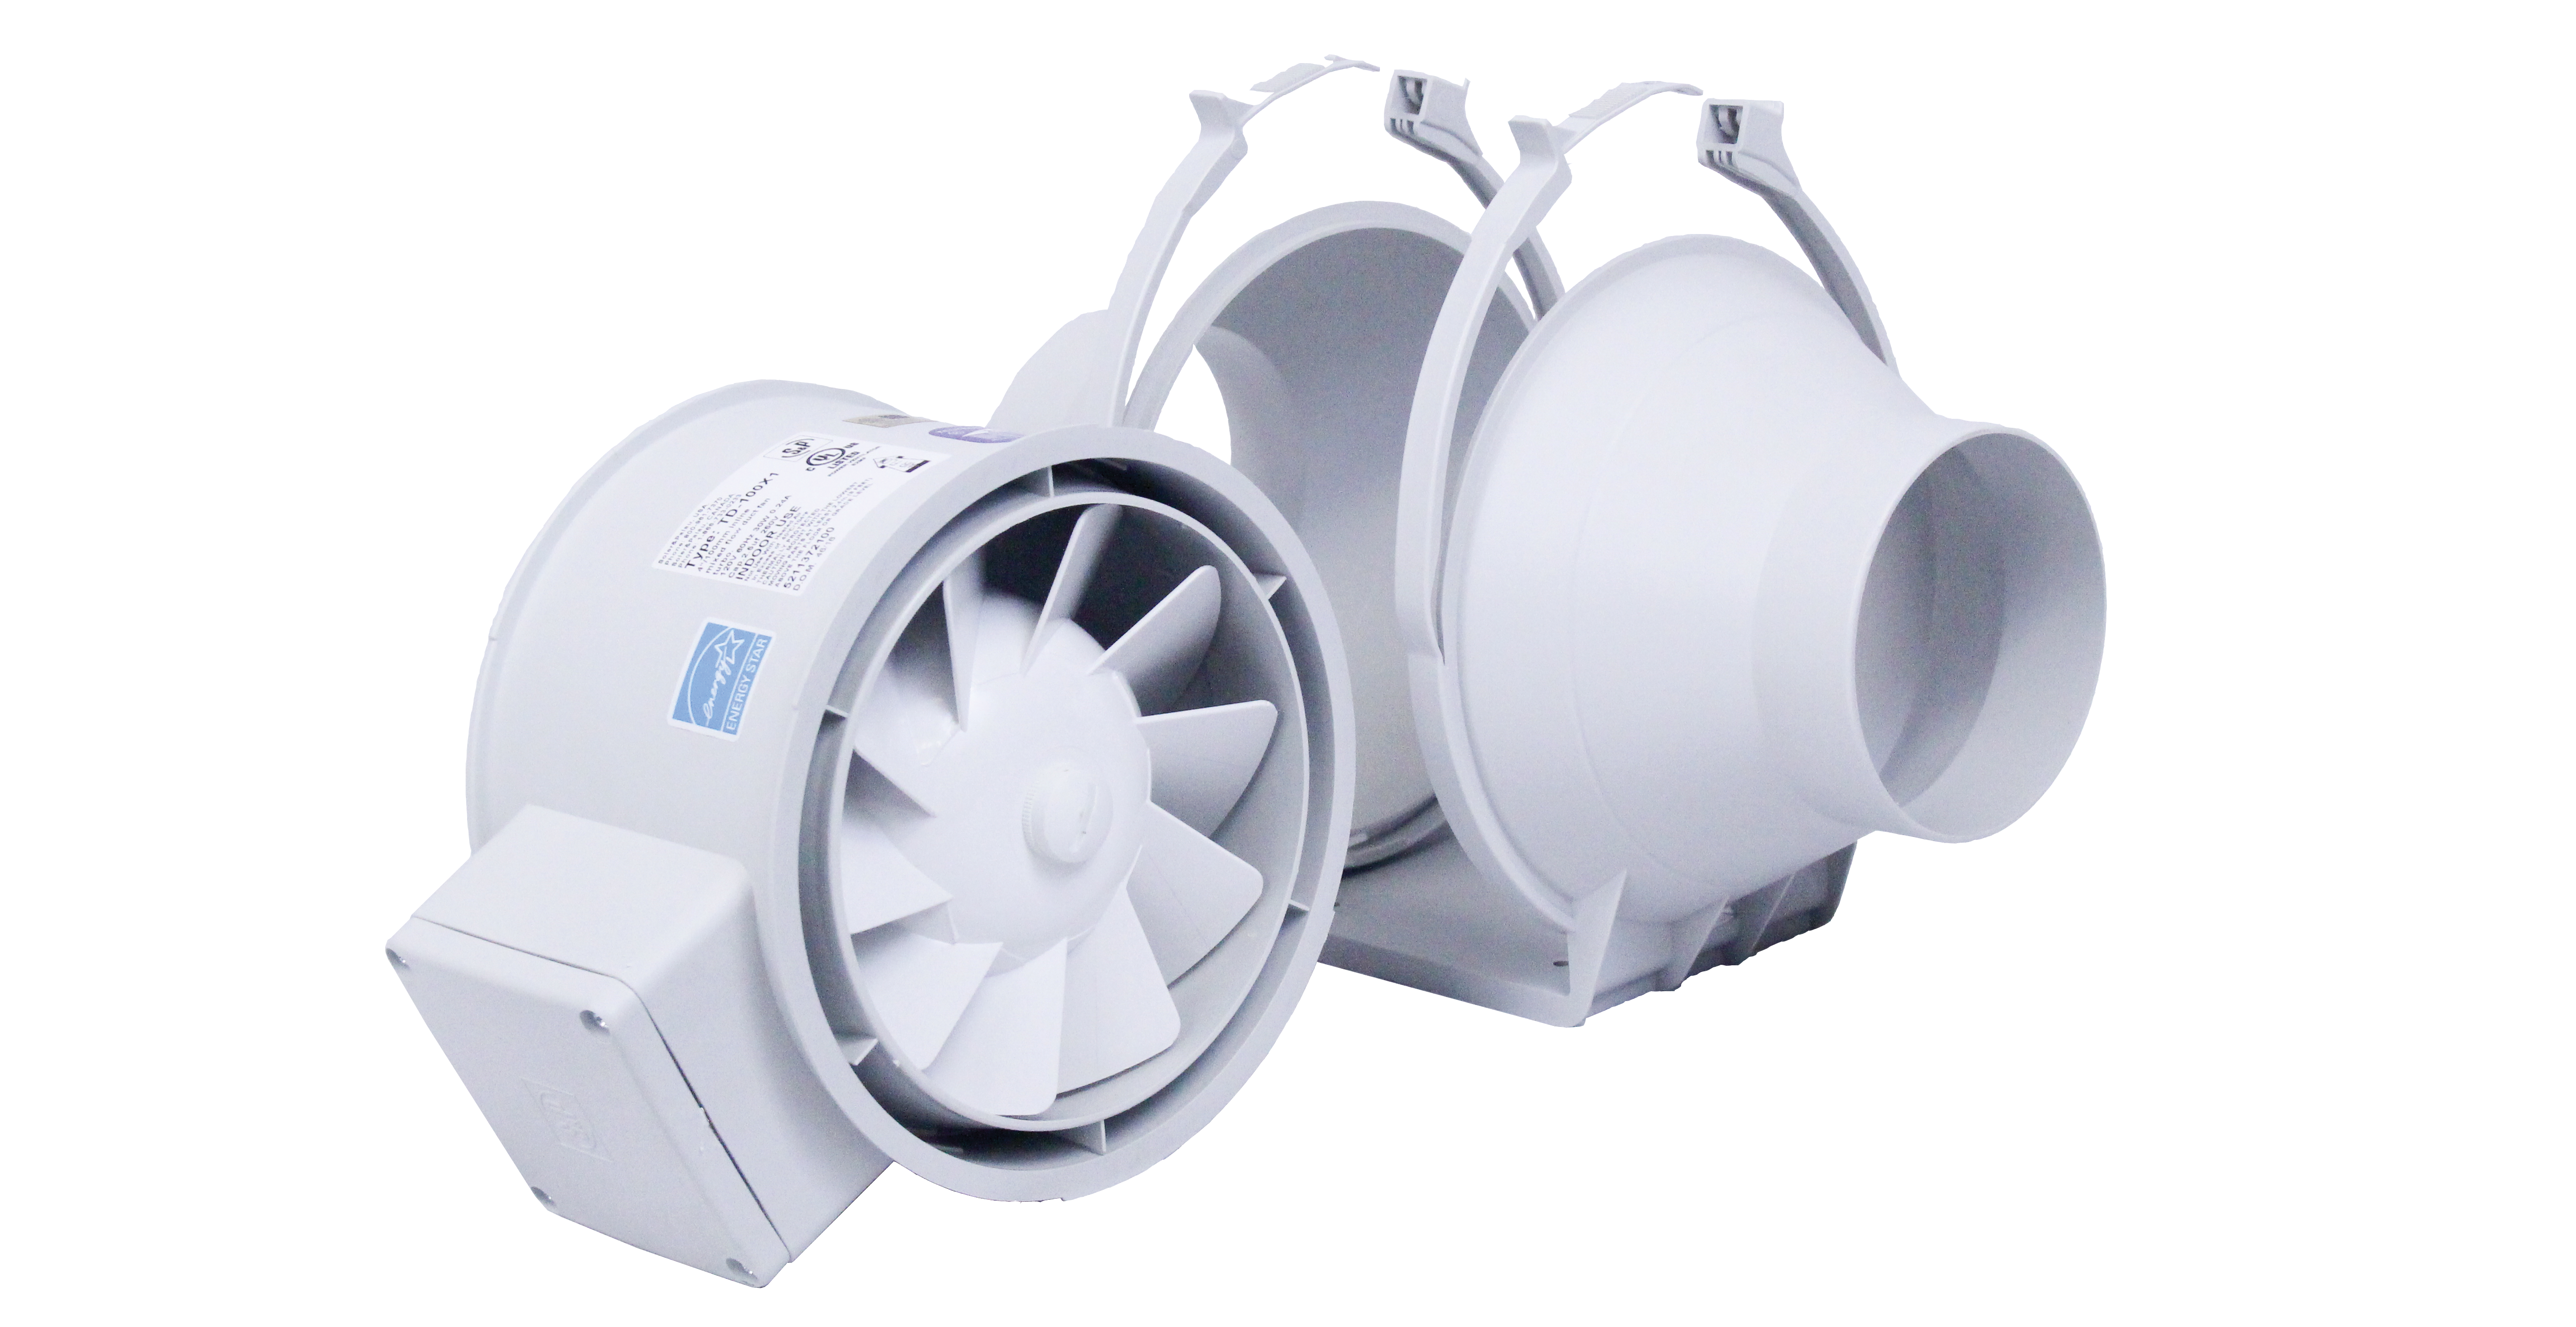
S&P USA's TD-MIXVENT In-line Mixed Flow Duct Fans have been designed with the professional contractor and engineer in mind. TD-MIXVENT is specially designed to maximize airflow performance with minimal noise levels in a small, compact housing. This makes the TD-MIXVENT series the ultimate solution for small to medium-sized ventilation installations which require a high airflow to pressure ratio and occupy minimum space (e.g., false ceiling voids, cabinets, and many other limited space environments).
All models include a "removable body" feature that enables the motor-impeller assembly to be completely removed or replaced without the need to interfere with the adjacent ducting. These models incorporate a powerful mixed flow impeller and internal air vanes located at the discharge end of the fan housing. This impeller and guide vane combination provides a smooth laminar airflow which in turn minimizes turbulence and noise and generates excellent airflow to static pressure performance ratio.
The unique design of the support brackets allows the motor and impeller assembly to be fitted or removed without dismantling the adjacent ducting, therefore facilitating any installation or maintenance.
Below is a step-by-step guide on how to easily remove and replace the motor section of a TD-MIXVENT fan.
Remove the Motor
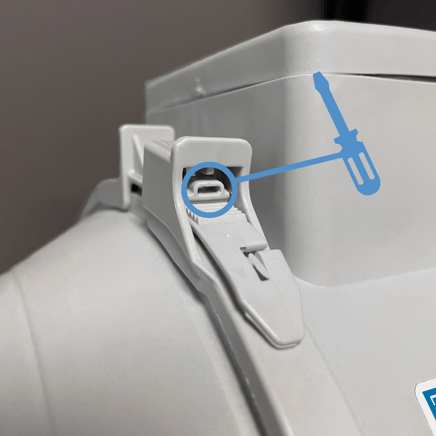
Step One: Insert a small screwdriver into the D-shaped opening and lift up. This will release the strap. If the strap doesn't release, press down on the lifted tab at the end of the strap and push out.
Step Two: Repeat with the other strap.
-png.png?width=436&name=blog%20(1)-png.png)
Step Three: Lift the motor section out of the mounting bracket
Replace the Motor
-png-1-1.png?width=641&name=blog%20(2)-png-1-1.png)
Step One: Ensure the motor section is in the proper direction. The exposed wheel is the inlet side and the side with the fixed air-flow vanes is the outlet.
.png?width=436&name=blog%20(3).png)
Step Two: Place the motor section into the mounting bracket. The motor section can be placed in whichever direction gives you the easiest access to the junction box.
.png?width=436&name=blog%20(4).png) Step Three: Thread the straps through the D-shaped openings and squeeze the tabs together to secure the motor section in place.
Step Three: Thread the straps through the D-shaped openings and squeeze the tabs together to secure the motor section in place.
Watch a step-by-step video: